Payment with credit card
To use your DeepScan service with your GitHub private repositories or beyond your free trial period, you will need to purchase a paid subscription for your team. Here's an overview of how billing works and some of your options.
Credit card payments are securely processed by 2Checkout payment gateway. We do not store or process your card details in our server - all payment information is directly passed to 2Checkout system.
After placing an order, an account is automatically created in 2Checkout MyAccount portal. You can securely manage your payments using the account.
Note: This article only applies to plans purchased with a credit card in DeepScan. For more information on plans purchased through our GitHub Marketplace, see Billing in GitHub Marketplace. If you've purchased a plan using PayPal, see Payment with PayPal.
Payment methods
We support the following credit cards.
- Visa/MasterCard
- American Express
- Discover
- Diners Club
- UnionPay
- JCB
Billing currency
The US dollar is the only currency we support.
Automatic payments
By default, Auto-Renewal option is enabled in 2Checkout when you purchase the plan. This means that every billing cycle, we will charge your payment method for the service you will use in the next billing cycle.
Billing cycles
We support the following billing cycles.
- Monthly
- Yearly—You get a discount by committing to a year of service.
You'll be charged at the initial purchase and on the same day of each subsequent month or year for the total number of seats in your team.
Manual payments
If you disable Auto-Renewal option, your plan will be downgraded after the next billing date.
If you wish to continue using the service in the next billing cycle, you will need to manually renew your subscription as follows.
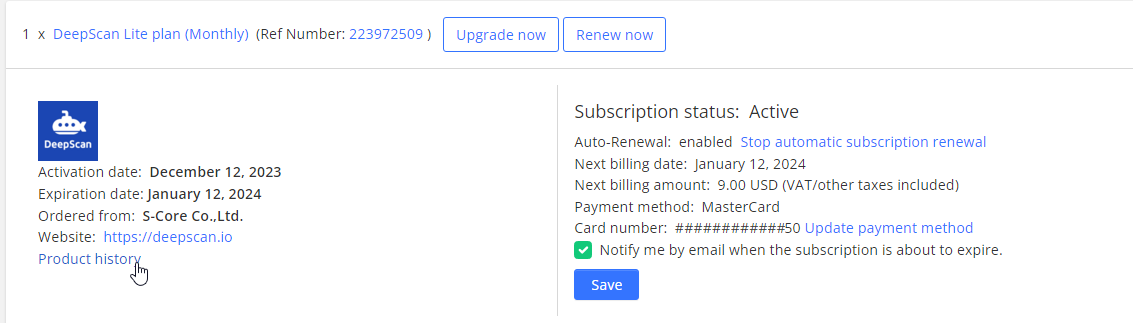
- Log in to 2Checkout MyAccount
- Under My Products tab, find your team's subscription using the order reference number
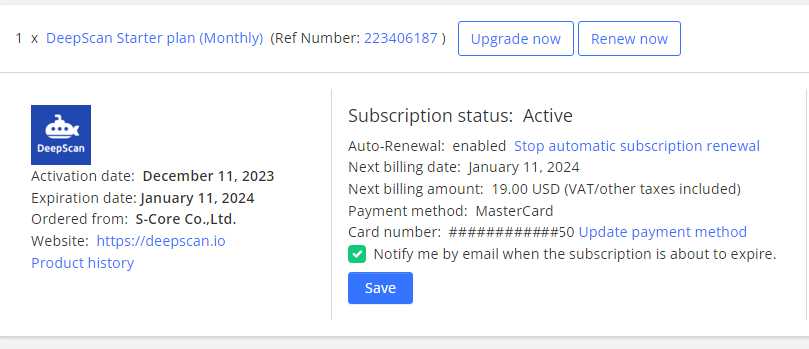
- Click the Renew now button
- A new window will be displayed and follow the steps in the window
- After placing the order, click Plan tab in the team settings page of DeepScan service
- Under Summary, you can see the extended next billing date
Seats
Team seats are subscriptions assigned to members in the team. Team owners and members each fill a seat, so you can adjust seats accordingly.
Adding seats to your team
If you'd like additional users to have access to your team, you can purchase more seats anytime through 2Checkout MyAccount.
When you purchase more seats, you are immediately charged a prorated amount for additional seats for the number of days left in your billing cycle. Additional seats are available to use immediately.
From your next billing date, you are charged the full amount. See billing examples.
To add seats to your team:
- Log in to 2Checkout MyAccount
- Under My Products tab, find your team's subscription using the order reference number
- To add seats, click Upgrade now button
- A new window is displayed and follow the steps in the window
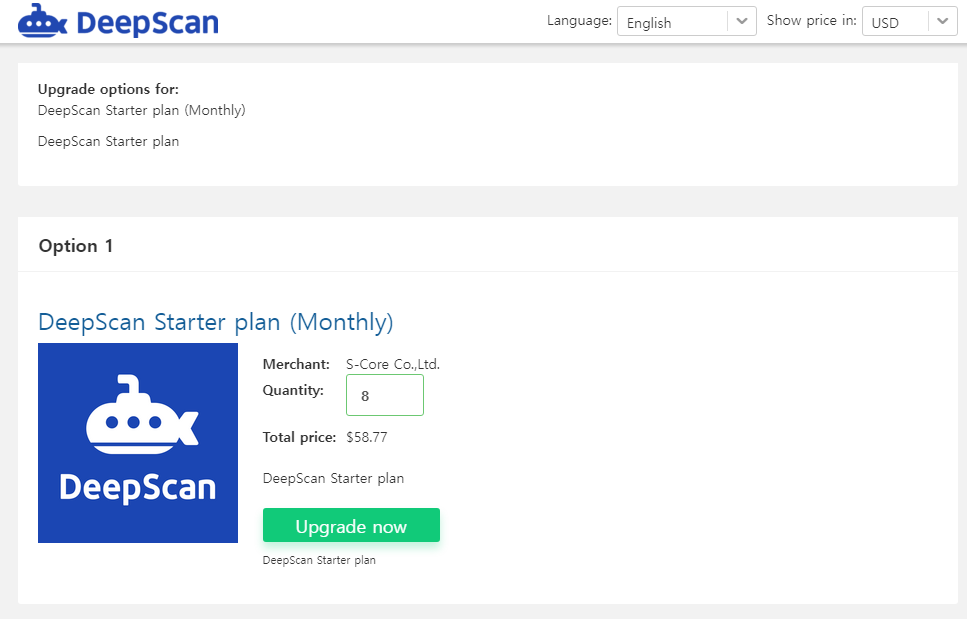
- Enter the number of total seats in the Quantity field including the additional seats
- After placing the order, click Plan tab in the team settings page of DeepScan service
- Under Summary, you can see the increased number of seats
Removing paid seats from your team
If you're not using all of the paid seats, you can remove seats through 2Checkout MyAccount.
You need to place an order to remove seats, even though actual payment will not take place. The reduced seats will be applied immediately after the order.
From your next billing date, you will be charged for the reduced number of seats.
- If the number of your team member is more than the reduced seats, you can no longer access the private projects and those projects are no longer analyzed automatically.
- Please check the total number of the team members before removing seats.
To remove seats from your team:
- Log in to 2Checkout MyAccount
- Under My Products tab, find your team's subscription using the order reference number
- To remove seats, click Upgrade now button
- A new window will be displayed and follow the steps in the window
- Enter the number of total seats in the Quantity field excluding the removed seats
- After placing the order, click Plan tab in the team settings page of DeepScan service
- Under Summary, you can see the decreased number of seats
Manage payment information
You can manage the payment information for your team's subscription in 2Checkout MyAccount.
Downloading invoice
- To view your orders and payments, click myAccount tab
- You can download the PDF invoice associated to each order
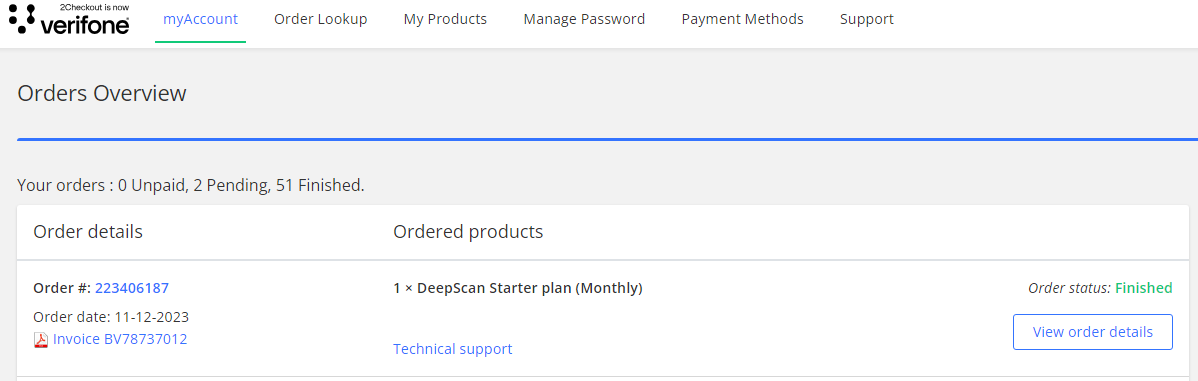
Viewing payment history
- Under My Products tab, find your team's subscription using the order reference number
- Click Product history link associated to the subscription
Changing payment methods
- To view and manage your payment methods, click Payment Methods tab
- You can register new credit card and use it as the payment method of your existing subscription

Changing plan type, billing cycle, or billing email is currently not supported. Please contact us at support@deepscan.io if you need to change them.
Accessing 2Checkout MyAccount
2Checkout MyAccount is the customer portal where you can view information about your orders, payments, and subscriptions. After placing an order through 2Checkout, your account will be automatically created in the 2Checkout MyAccount system.
Login using access link
You can log in to 2Checkout MyAccount by receiving an access link with your billing email.
- Enter either your email address associated with the order or the order number in your receipt email
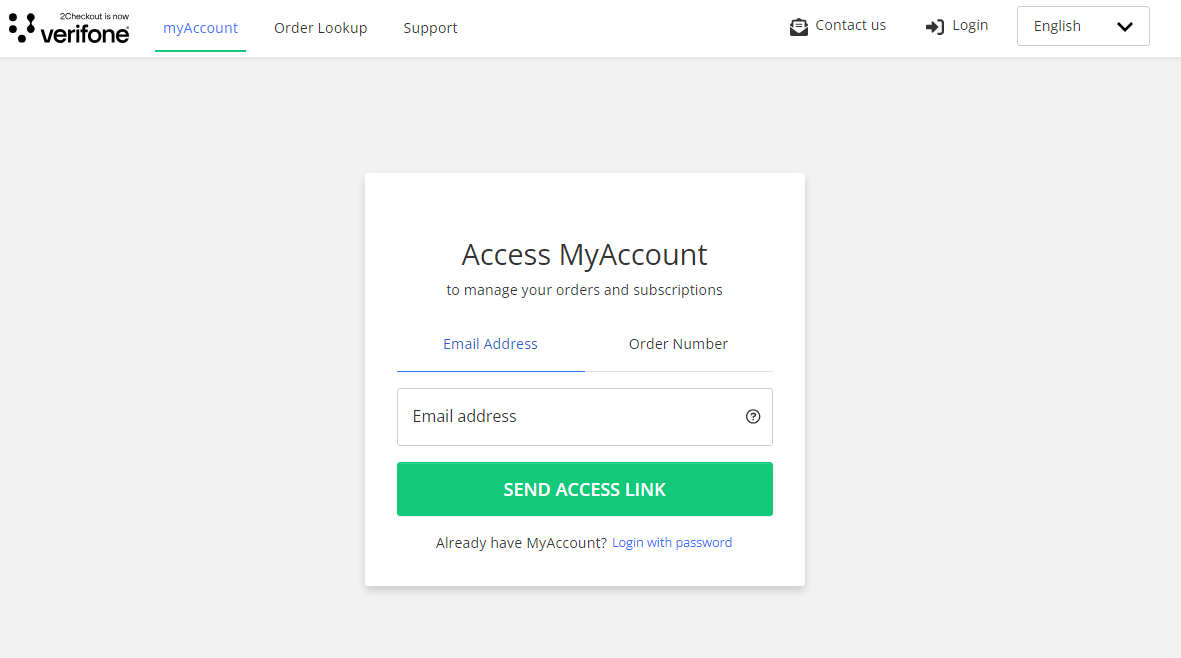
- Click the SEND ACCESS LINK button
- You will receive an email with an access link that will log you directly into 2Checkout MyAccount
Login using password
Once you have logged in to 2Checkout MyAccount, you can choose to create a password to avoid acquiring the access link each time.
- Click the Manage Password tab
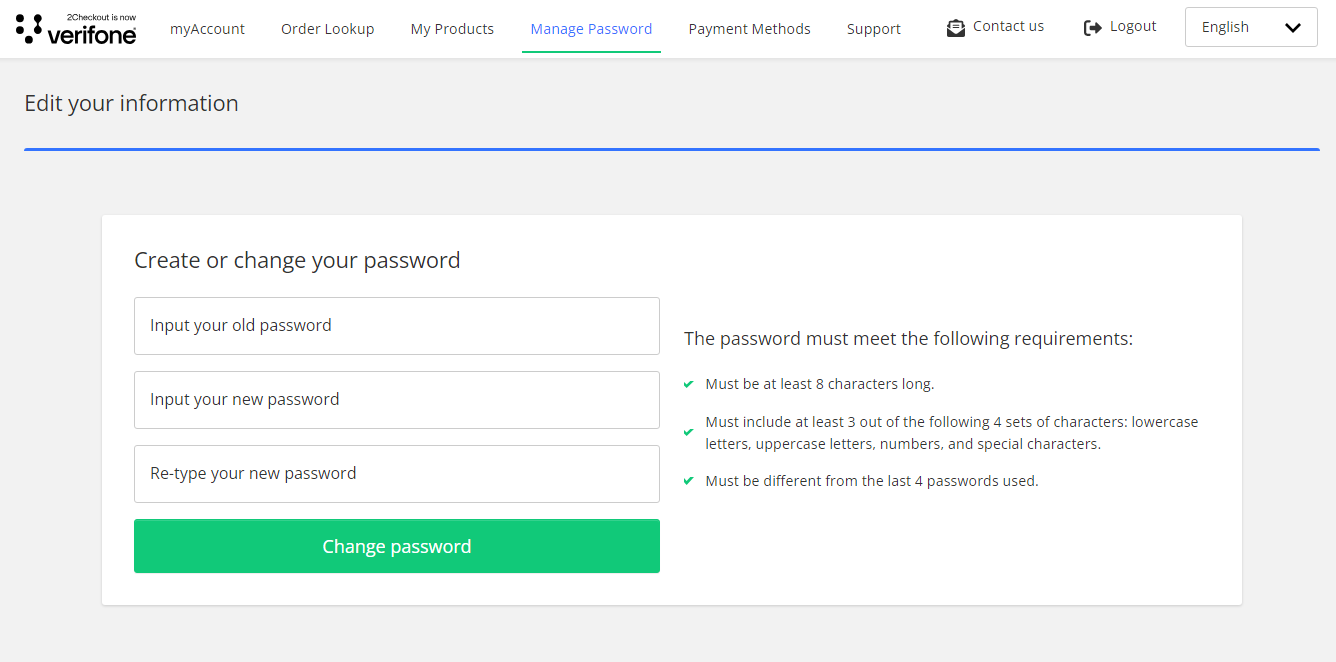
- Create your password
- Now, you can log in with your password without sending an access link
Billing examples
For example, suppose that your team began a subscription on June 4th (5 seats monthly).
- Initial purchase: June 4th, you subscribe 5 seats monthly
- June 4th, you are charged 5 seats
- July 4th, you are charged 5 seats (monthly subscription)
- Upgrade: July 16th, you purchase 3 more seats
- July 16, you are charged a prorated amount for 3 additional seats for the time between July 16th and August 3rd
- August 4th, you are charged 8 seats